How to generate cash invoice
A Cash Invoice is a type of sales invoice that is issued when the customer makes an immediate payment — typically in cash or through a bank payment (like UPI, card, or cheque) — at the time of the transaction.
Unlike a credit invoice (where payment is due later), a cash invoice records the sale and the payment simultaneously.
🔍 Step-by-Step Process
Step 1: Open the Cash Invoice Screen
Press Ctrl + G (or Cmd + G on Mac).
Type "Cash Invoice" in the search bar and select it from the list to open the invoice creation page.
OR
Please refer to this link for the Cash Invoice page: https://books.giddh.com/pages/vouchers/cash/create
Step 2: Enter Customer Details
Customer Name: Enter the name of the customer. If it’s a walk-in, you may use “Cash Customer”.
State: Select the customer’s state to ensure proper GST tax calculation.
You can also add:
Customer email or mobile number (for sending invoices)
Billing and shipping addresses (optional but useful)
.webp)
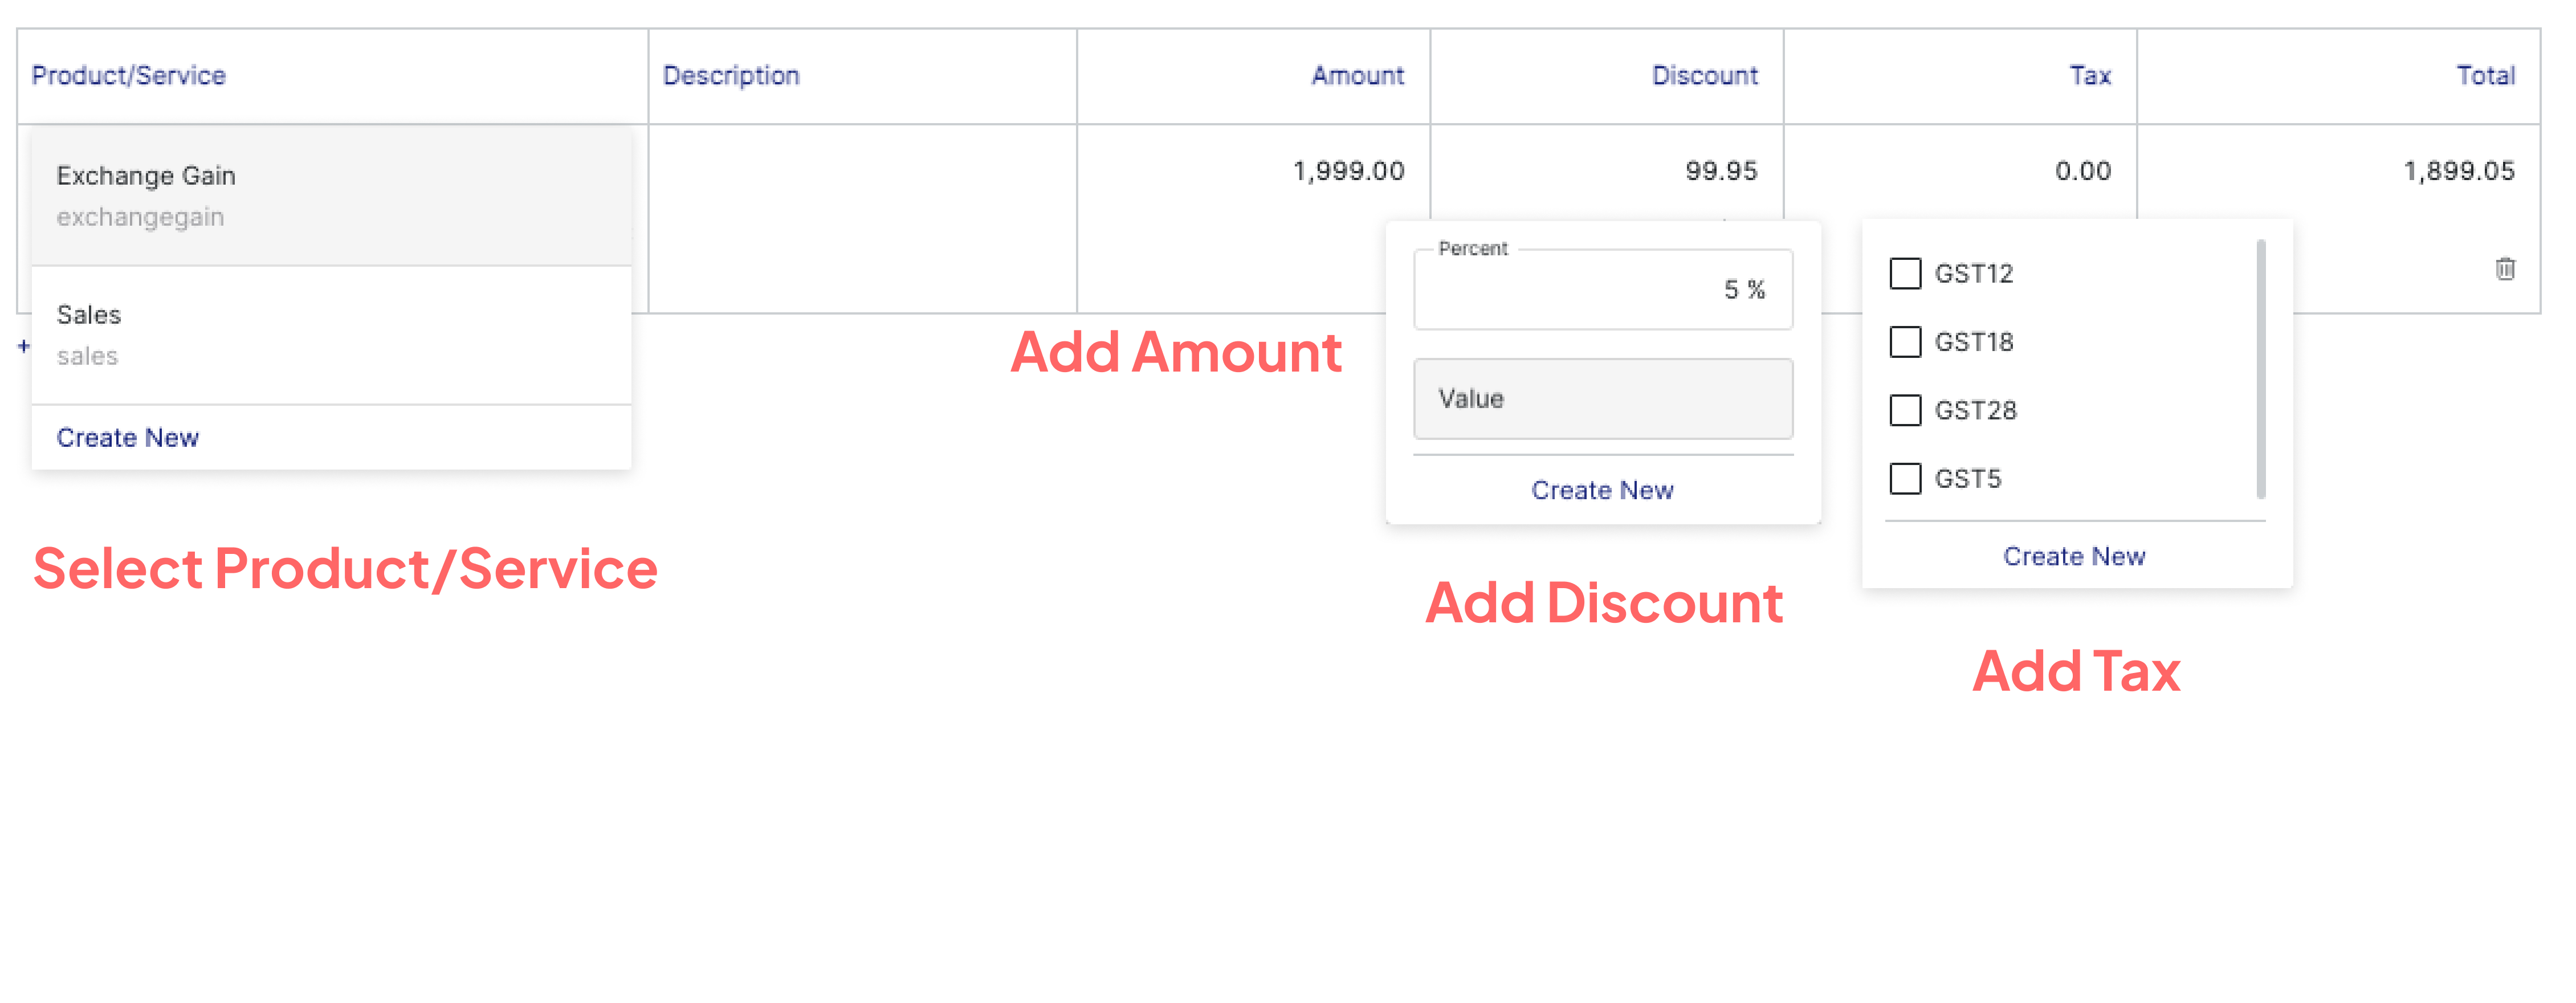
Step 3: Add Items or Services
In the Product/Service section, you need to fill in the details of the goods or services being sold. This information forms the core of your invoice and affects the total billing amount, inventory, and tax calculations.
Fields to Fill:
Item Name: Select the product or service from the drop-down list. These should already be added to your Giddh inventory master.
Rate: Provide the per-unit rate for the selected item. The system will automatically multiply it by the quantity to calculate the item total.
Discount: Discount refers to the reduction applied to the item price before tax calculation.
Giddh supports two types of discounts:
Fixed Discount – A specific amount is reduced (e.g., ₹100 off).
Percentage Discount – A percentage is deducted from the item’s rate (e.g., 10% off).
Applicable Taxes: If a tax rate is predefined in the product master, it will auto-fill here (e.g., GST). You can edit it if needed, based on the customer's state and tax applicability.
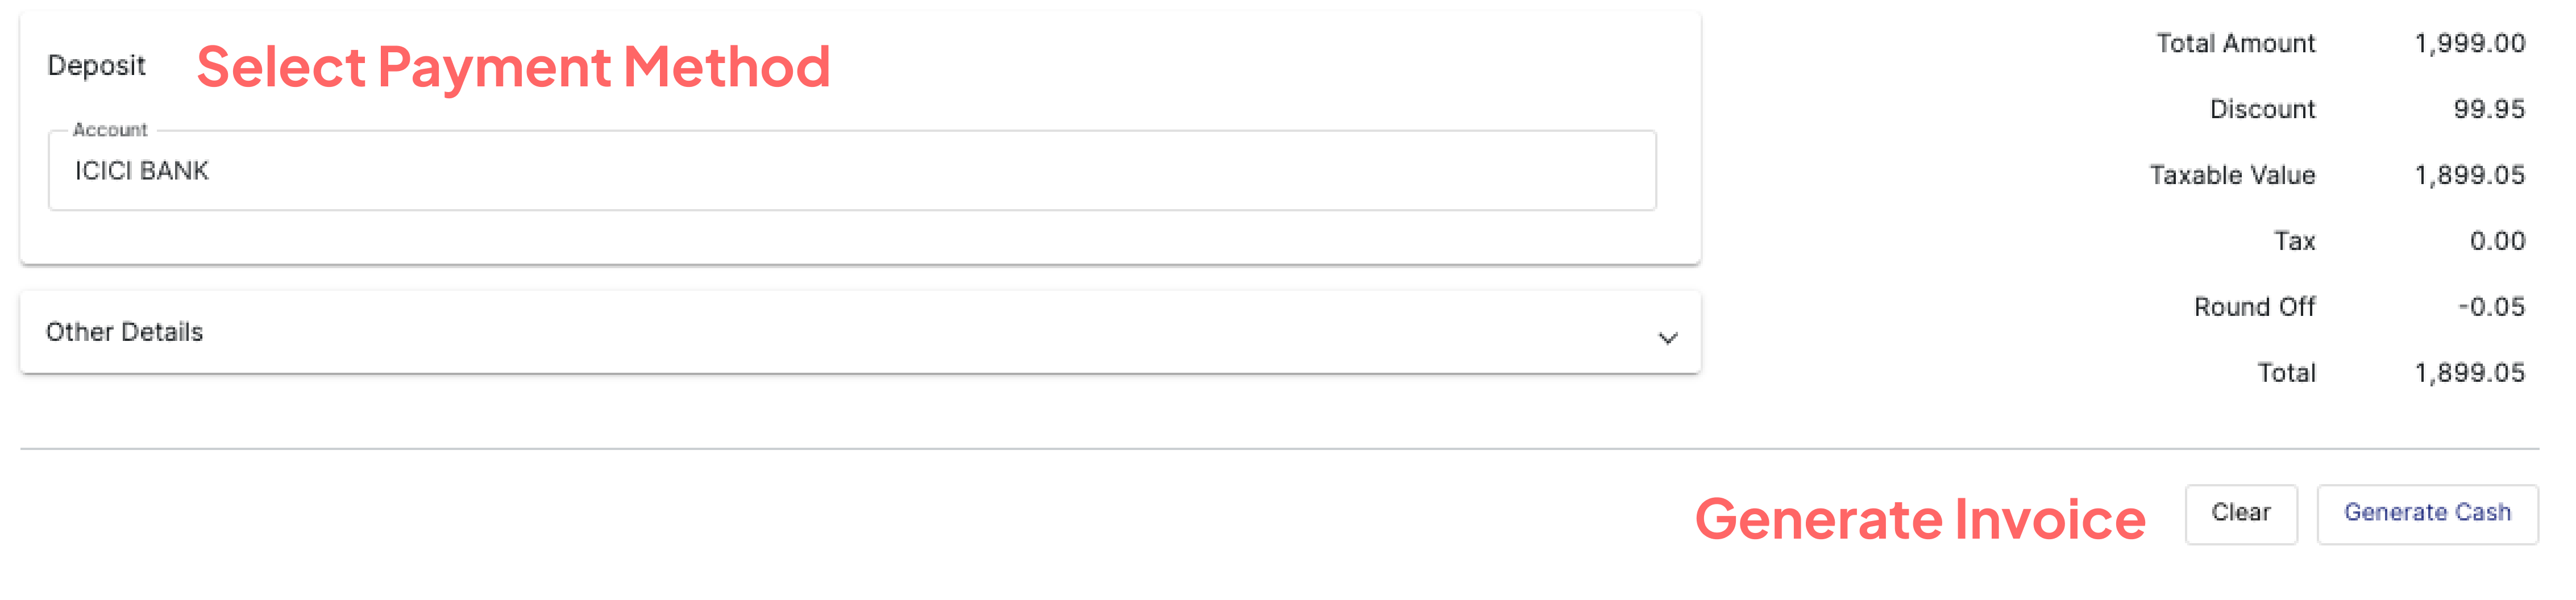
Step 4: Select Payment Account
Under the “Select Account” section:
Choose Cash if the customer is paying in cash.
Choose the appropriate Bank Account if the payment is received via cheque, UPI, or net banking.
This ensures the entry is directly recorded in the respective ledger.
Step 5: Review & Generate Invoice
Before finalizing the invoice, it’s essential to review all the details to ensure accuracy and compliance. This step ensures that your sales data, tax records, and customer information are correctly captured in your accounting books.
✅ Things to Review Before Generating the Invoice:
Customer Details: Confirm the customer name, billing address, and state, as these determine tax calculation.
Date: Verify the invoice date — this affects your tax period, reporting, and ledger entries.
Item Details: Ensure the correct items, quantities, rates, and discounts (if any) are applied.
Tax & Discount :Before generating the invoice, it's important to thoroughly review the Tax and Discount section to ensure accuracy and compliance.
Payment Mode: Confirm that Cash or the appropriate Bank account is selected under the payment section.
Total Amount: Verify the total invoice value including all taxes and charges.
Generate and Finalize the Invoice
Once all the information is reviewed: Click on “Generate Invoice”.
You will be redirected to the invoice preview screen.
Please refer to this video to learn how to create a Cash Invoice.