How to generate Proforma
A Proforma Invoice is a non-binding document issued before a commercial invoice. It serves as a quotation or intent to sell and is commonly used for internal records, pre-approval, or export transactions. Below is a detailed step-by-step guide to help you create a proforma invoice in Giddh.
Step 1: Use Search to Access the Proforma Module
Press Ctrl + G (Windows) or Cmd + G (Mac) to open the universal search bar.
Alternatively, click on the Search icon (🔍) located at the top-right of your screen.
Type “Proforma” in the search bar and select the Proforma Invoice module from the dropdown results.
OR
Please refer to this link for the Proforma Invoice page: https://books.giddh.com/pages/vouchers/proformas/create
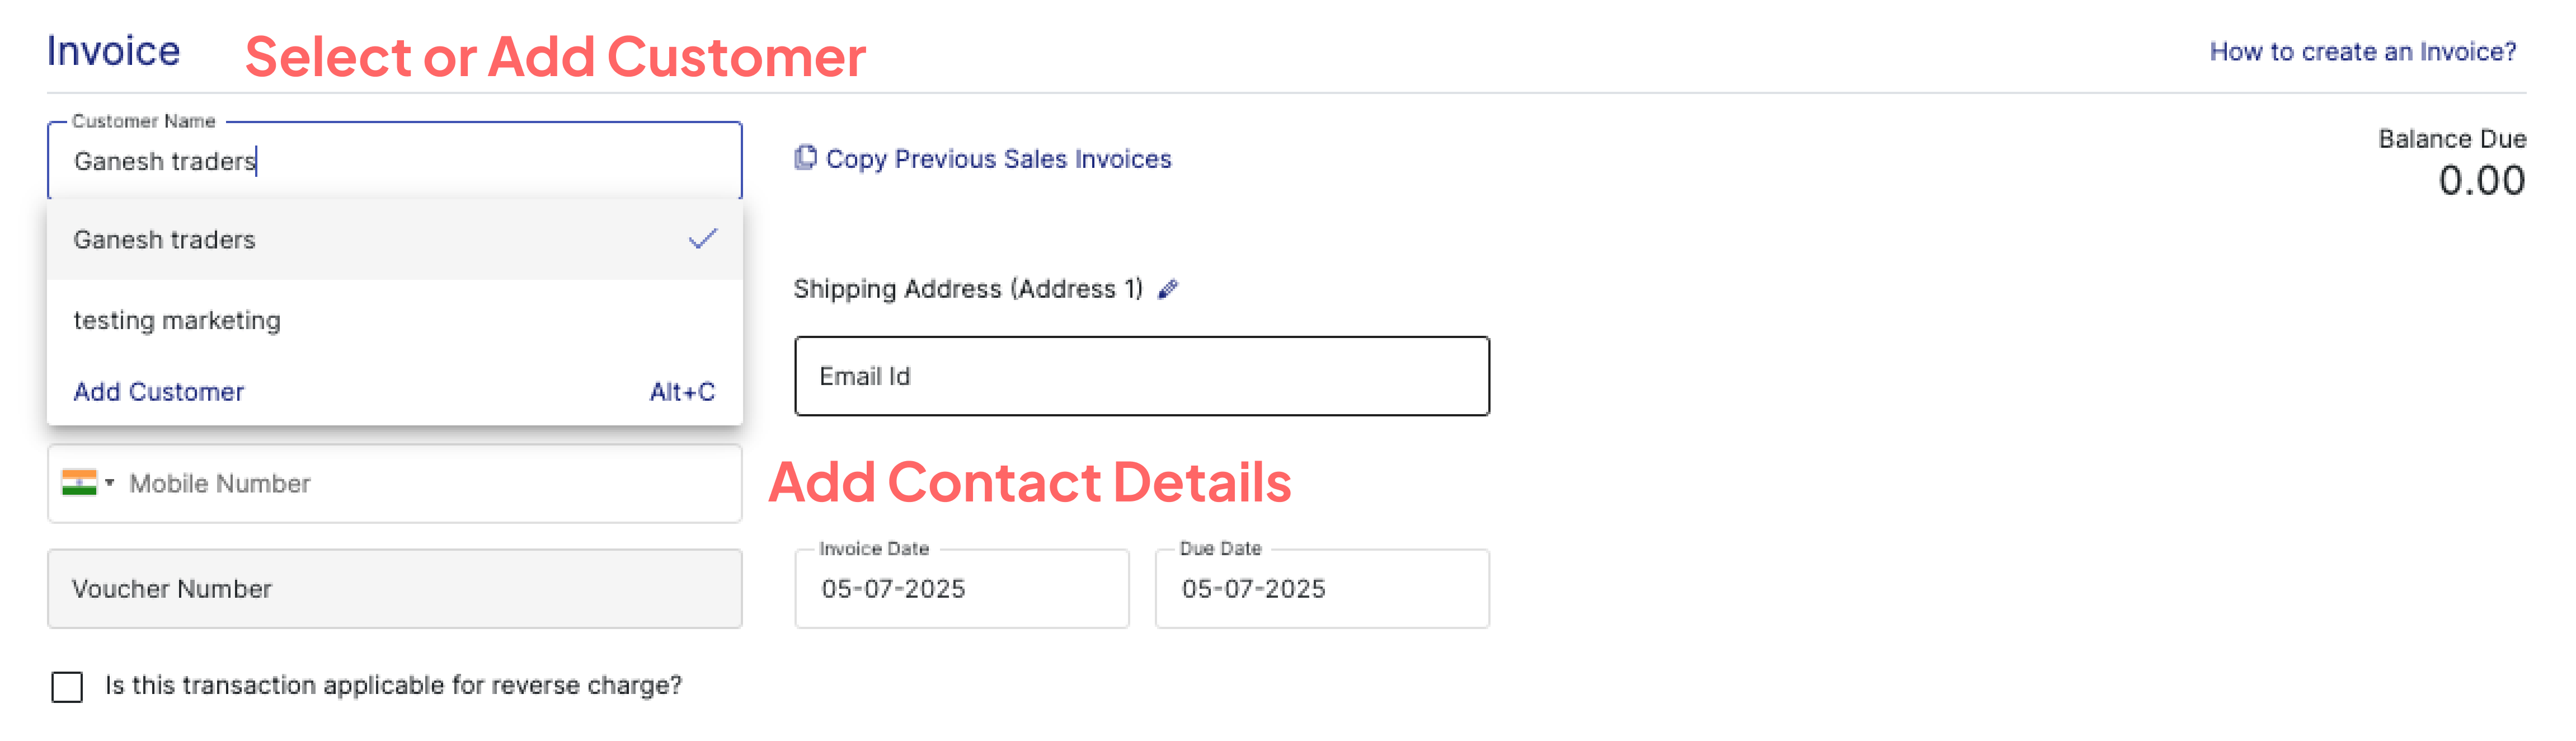
Step 2: Add or Select a Customer
In the Customer field, select an existing customer from the drop-down.
If the customer is new:
Click on "Add Customer"
Enter required details such as: Customer Name, GST(if applicable), Billing Address, PIN code, Select party type
Contact Details:- Contact number and Mail id.
These details will be saved in your master records for future use.
.webp)
Step 3: Fill Invoice Details
Now fill out the invoice basics:
Contact details – Enter the customer's contact number and email address
Invoice Date – Select the current date or any relevant billing date based on when the transaction occurred.
Due Date (Optional)– Specify the payment due date if it’s a credit-based transaction. This helps in tracking receivables and sending payment reminders.
Terms –Indicate whether the transaction is applicable under Reverse Charge Mechanism (RCM).
For example: "This transaction is subject to reverse charge under GST, if applicable.
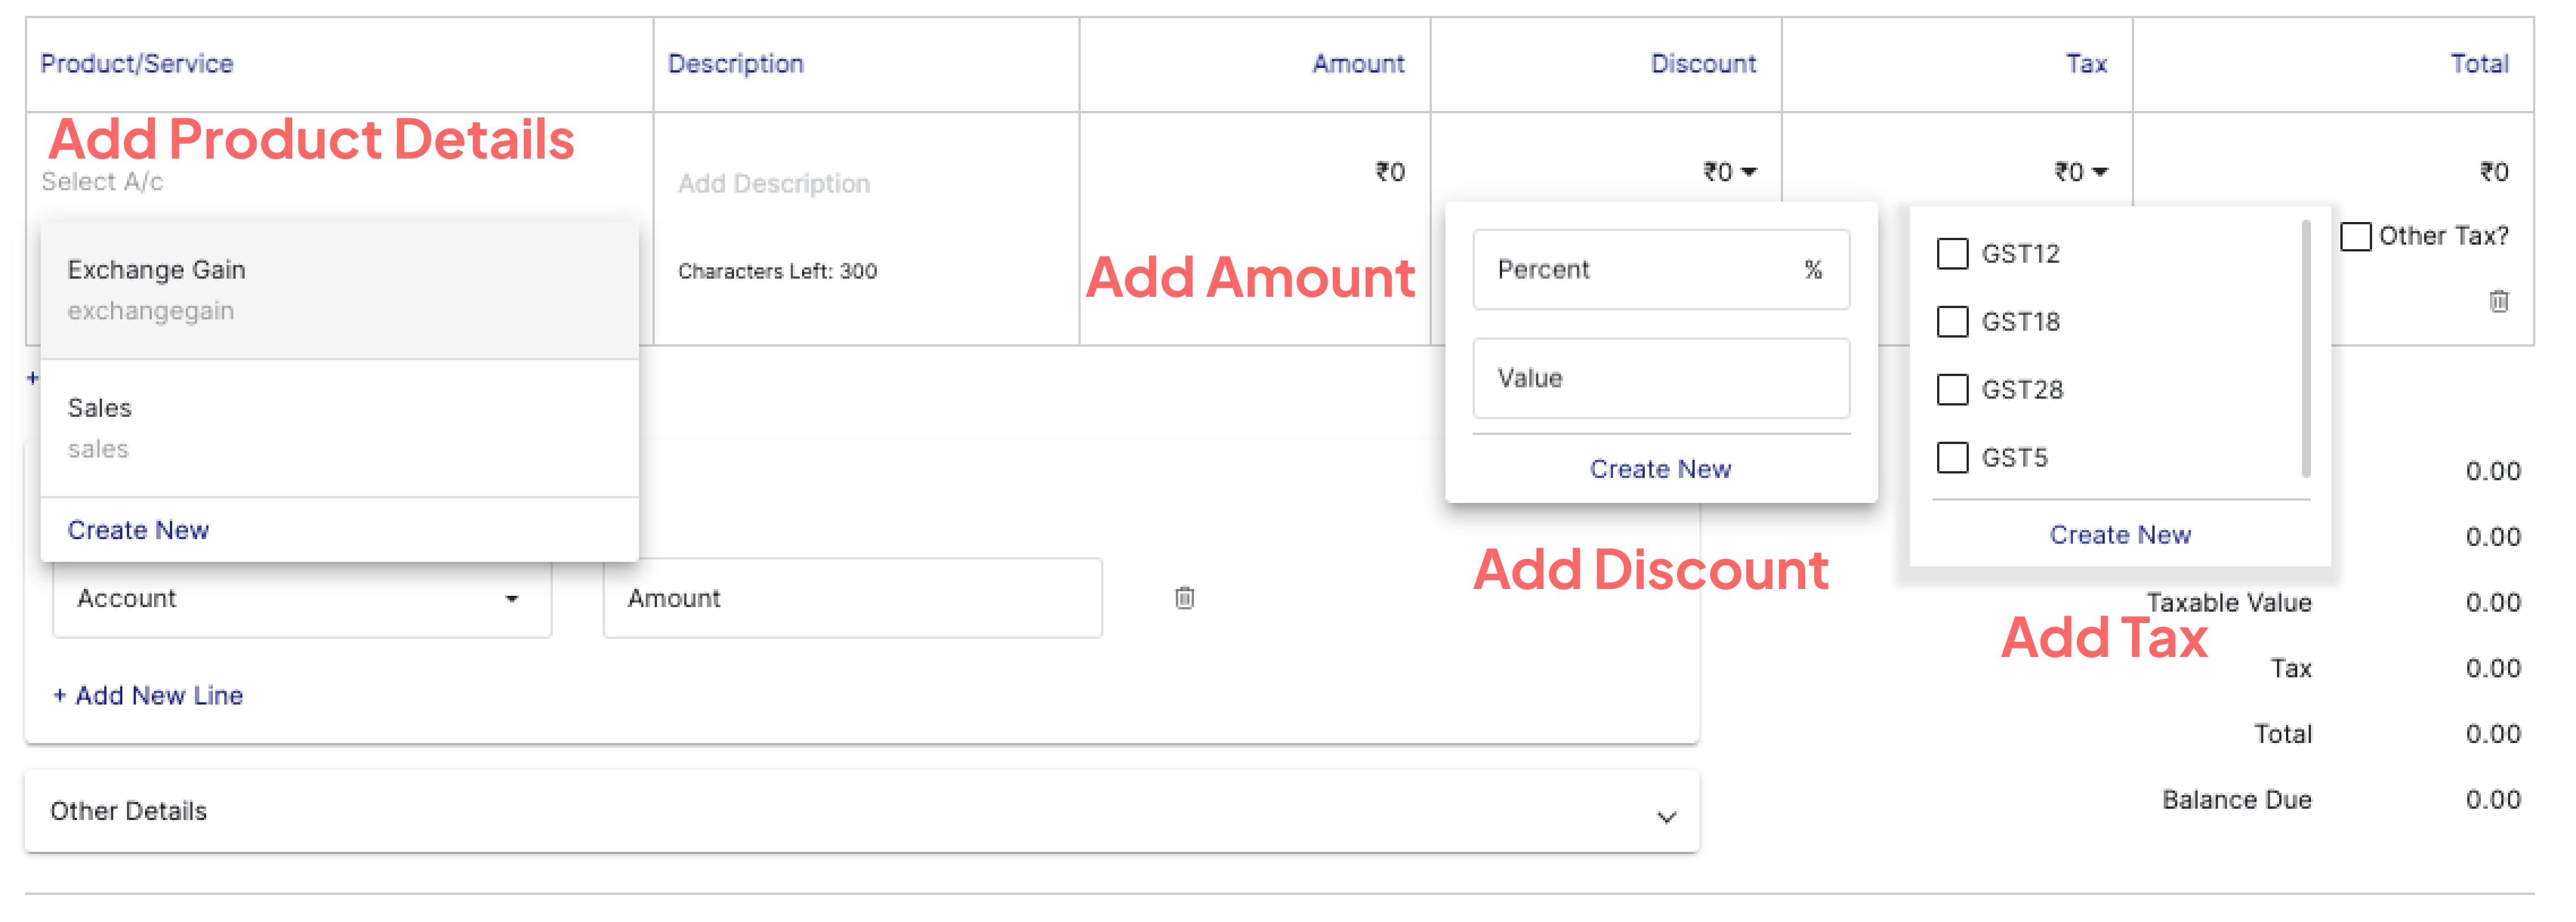
Step 4: Add Product/Service Information
Click on “Product/Service” to add products or services.
For Each Item, Fill in the Following Details:
Item Name: Enter the name of the product or service you are billing for.
Rate/Price: Enter the rate or unit price for the item or service.
Tax (GST): Choose the applicable tax rate based on your item and place of supply:
Discount (Fixed or %): You can apply either:
A fixed discount amount (e.g., ₹500 off)
Or a percentage-based discount (e.g., 10%)
If you have many items to add, click on “Add Bulk Entries” to upload or input multiple items quickly.
Step 5: Choose Action Type (optional)
Once all details are entered, Click on the “Other Details” button (Optional):
Fill in the optional fields:
Ship Date – Date of shipment
Ship Via – Mode of transport (e.g., courier, transport agency)
Tracking No. – Shipment tracking number
Add Note – Any additional remarks for internal use or customer reference
Attach Voucher – Upload any supporting document or payment proof if required
Step 6: Choose Action to Finalize the Proforma
At the bottom of the invoice page, click on the “More” button.
You’ll be presented with the following options:
Create & Send – Instantly generate the proforma invoice and send it via email or SMS to the customer (ensure email/SMS integration is active).
Create & Print – Generate the proforma in a printable format, ready for documentation or manual delivery.
Create – Save the proforma invoice in Giddh without sending or printing. You can send or print it later.
✅ Proforma Invoice Successfully Created
The generated proforma will be saved in the system and can be accessed anytime under the Customer » Invoice » Proforma Invoices section.
You can later convert this proforma into a Sales Invoice if the order is confirmed.